
Depending on the version of Microsoft Excel you are using, the steps to load OData can be slightly different. If you're working with Excel 2016, see Loading 0Data with Excel 2016.
The Power Query Plugin
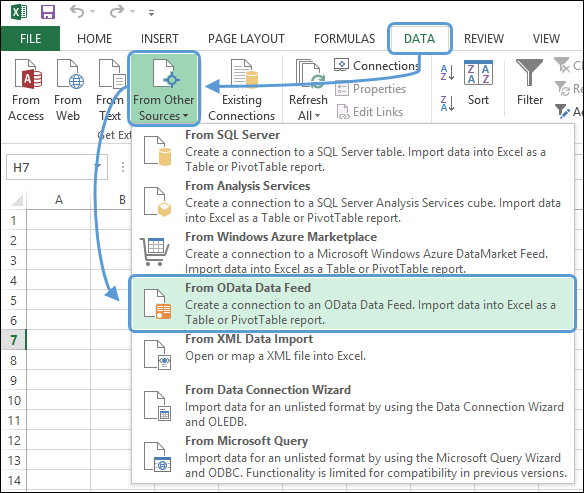
Please note that the built-in OData feature (visible below) will not work.
Click image to expand or minimize.
Instead, to load OData with Excel 2010 and 2013, you will need to download and install the Power Query plugin.
Loading OData with Power Query
After downloading and installing the Power Query plugin for Microsoft Excel, follow these steps to load oData:
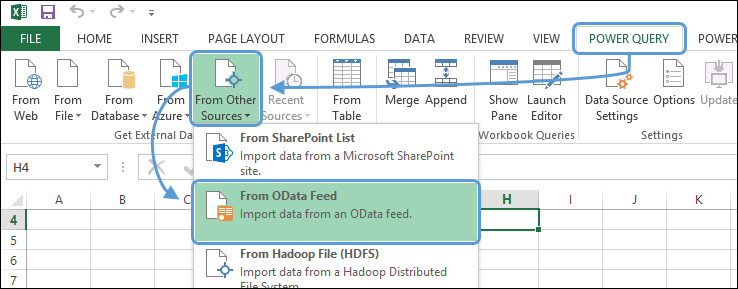
- On the POWER QUERY tab, in the Get External Data group, click From Other Sources, and select From OData Feed.
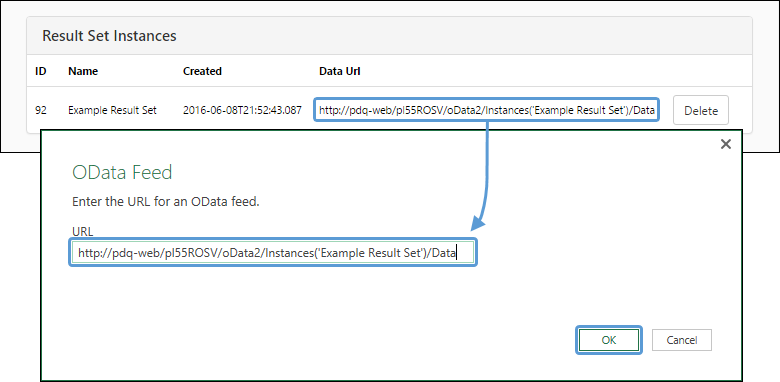
- A window will open where you will be asked to enter your OData access URL. Copy a URL from The Instances Page, add it to the URL field, and click OK.
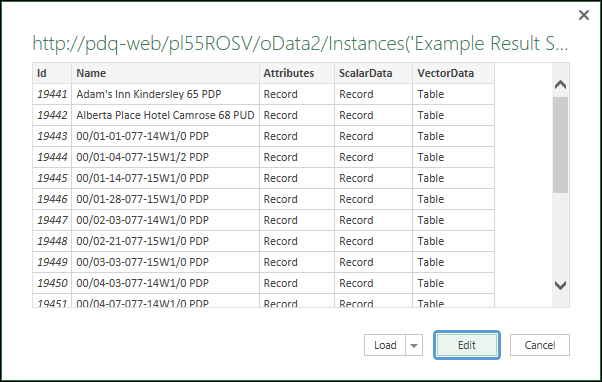
- A summary table will appear that lists the objects in the result set you are loading. As you can see in the example below, each one of the objects being loaded includes attribute, scalar, and vector values. Ensure all of the objects you wish to work with are included in the result set.
- Click the Edit button to open the Query Editor. Using the Query Editor you will be able to specify what attribute, scalar, and vector data will be downloaded.
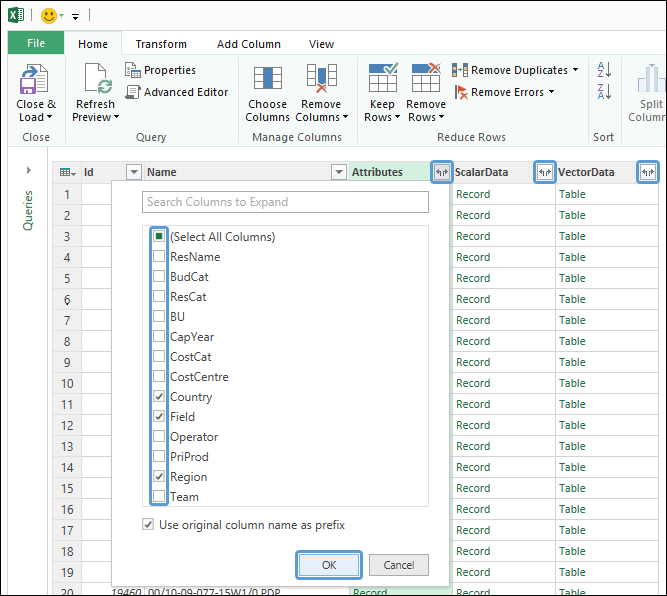
- When the Query Editor opens, click on the icon in the header of the Attributes, ScalarData, or VectorData columns.
- A window will open that will list all of the value types that can be displayed (these lists will vary depending on the data type you select). In the example below, Country, Field, and Region values were selected.
- When you have selected the data you wish to download, click OK. The window will close and the data you selected will be added to the table.
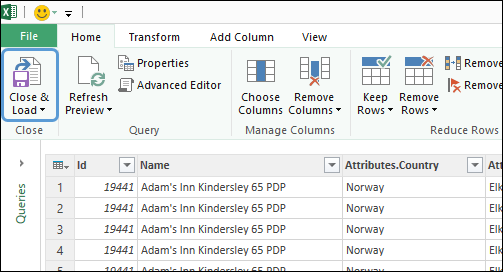
- Repeat steps 5–9 to select all the data you wish to download. When you have finished, click the Close & Load button in the Close group.
- The Query Editor will close and your data will be loaded. Loading times will vary based on the quantity of data you choose to load.
Click image to expand or minimize.
Click image to expand or minimize.
If objects are missing, you will need to create a new result set and generate a new model for that result set.
Click image to expand or minimize.
Click image to expand or minimize.

Click image to expand or minimize.
Click image to expand or minimize.
Make Changes to your Query
You can make changes to your query by following these steps:
- On the QUERY tab, in the Edit group, click Edit Query.
- The Query Editor will open.
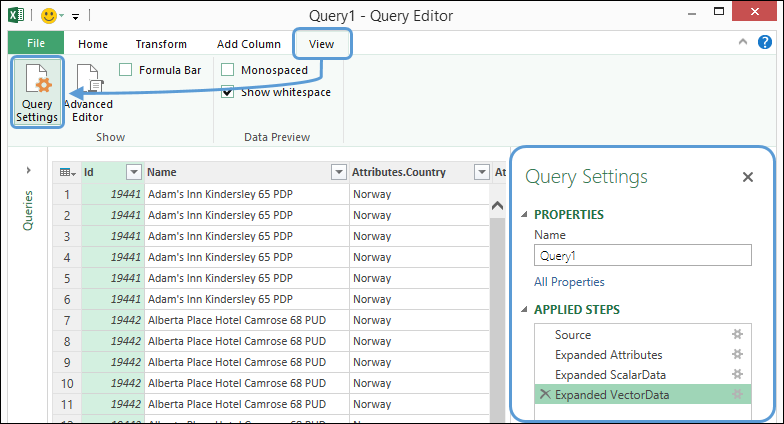
- If the Query Settings pane is not open, Click on the View tab, and then select Query Settings in the Show group.
- Click the Cog icon next to the right of an applied step to modify the attributes, scalar variables, and/or vector variables that will be downloaded.
- Clicking the X icon to the left of an applied step will undo the step entirely.
- When you have finished modifying your query, click the Close & Load button.
- Your query will run again and your updated data will be added to your spreadsheet.

Click image to expand or minimize.
Click image to expand or minimize.
Additional Information
Excel User Documentation
For more information on working with Microsoft Excel, see the Microsoft website.